

 |
> E&O/GL Insurance for Home Inspectors Competitive Rates, Broad Coverage, Free Risk Management, online inspection support for tough questions, discounts on education and more… Professional Coverage, Competitive Pricing Shop OREP today! |
Flashing Case Study: When Dissimilar Materials Meet
By Greg Johns, WIN Home Inspections
In roof framing, it is widely understood areas of most interruption, or planar differences, pose the greatest risk for leaking (think valley, or greedy dormer). Ergo, the more complicated a home’s roof line, the greater risk for leaking. How do professionals manage this? Flashing.
Now, let’s move that concept down from the roof to the wall assembly. If you have a wall made of wood, that wooden wall will inevitably end. In our region of middle Tennessee, it usually ends on the foundation (concrete blocks aka CMUs), but slabs are becoming more prevalent and we do have old housing stock (stone and brick foundations).
Where that wooden wall ends (you have to picture the wall naked of siding/cladding) the materials are dissimilar (usually wood and concrete or masonry). Dissimilarity, in home performance, is the ideal location for issues to develop—usually via air, moisture, and pests. The solution would be, like roofing, flashing. The problem is that the flashing of wall assemblies and components is not a highly regulated area of home production in our region and, based on what I see often, there is a wide spectrum of understanding and skill by those performing the work.
Oftentimes, wall flashing is overlooked, or under-executed. In some of our housing stock, the home survives with deficient wall flashing purely because the interior enclosure is very much perforated (not air-tight) and the walls can dry. But what happens in our younger homes?

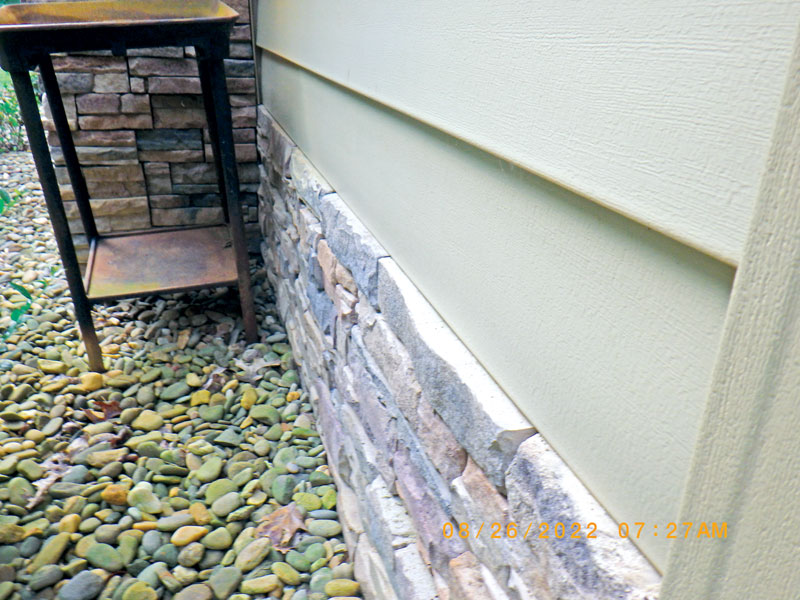
Figure 1: Shelf Between Cement Siding and Stone Veneer
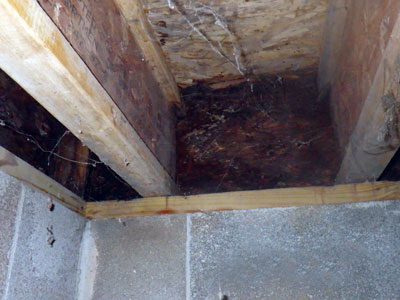
Figure 2: Rim Joist and Discoloration
The Home
This home in particular was built in the mid-2000s and likely was intended to be a moderate-to-high-end home based on materials used and aesthetic finishes. Composite cement fiber product was used for siding. Concrete cast stone veneer (“lick and stick” as it is so lovingly referred to here) was used for both foundation veneer AND some areas of siding. Where the cement boarding terminated and adjoined the stone veneer, there sat a shelf. A very flat, flat, shelf (See Figure 1: Shelf Between Cement Siding and Stone Veneer).
As best I could tell, there was no flashing beyond a typical weather-resistive barrier installed along this common joint line (which ran around the entire perimeter). The concrete cast stone veneer appeared to be adhered via thin-set directly to the wall assembly over the Weather-Resistant Barrier (WRB) with no adequate separation and this negates any water management ability…but, I digress.
Our flat joint had no special flashing installed. Flat surfaces hold water, or at least don’t let it drain away and off. When water is held flat, it will follow capillarity (think trees) and find other points by which to travel—up, down, and sideways. At our dissimilar joint with no special flashing, the water readily accessed a percentage of the walling assembly over time. Time and moisture vs. (Oriented Strand Board) OSB. Which do you think wins? Hint: pick moisture.
Figure 2 shows the rim joist and discoloration, fungal growth, and degradation due to flat surfaces and no flashing at the exterior.
This 20-year-old home was set up for disaster at the onset of construction. With no attention to flashing detail, and no apparent understanding of needing to protect engineered laminated products (OSB, manufactured I-joists, which were the substructure framing), this home started rotting very soon after construction. And unlike old draftier housing stock, this home was less drafty (still drafty, just less drafty). Less drafty means less drying or longer drying time. Prolonged exposure to moisture delaminated the resins/adhesives in the engineered materials, primed the wooden fibers for pest snacking, and degraded the general strength of the framing.
(story continues below)

(story continues)
Enter the Inspector!
By the time I came on the scene, the damage had already been done. The un-flashed joint work at the exterior was my first clue. My knowledge of the abhorrent installation practices of concrete cast stone veneer in my Tennessee market was my second. A very pervasive and present musty odor in the garage was my third (have we talked about garages not being air tight and communicating air with crawlspace and interior space?!?). My fourth and final clue was the degrading or already deteriorated rim joist, I-joist ends, and sill plates around the perimeter of the structure. Only along the perimeter of the structure in these areas.
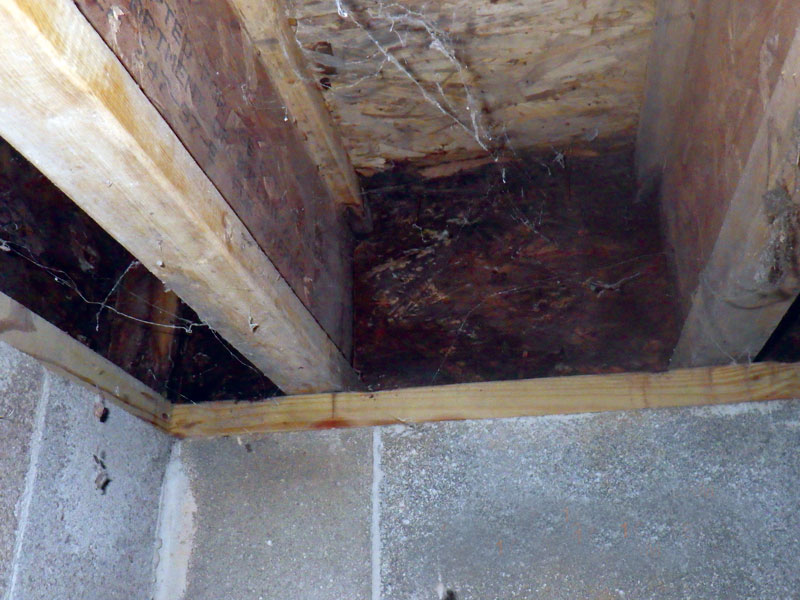
Figure 3, shows late-stage degradation to rim joist, sub floor, and supporting framing—all due to no proper flashing.
Some Science
Wood is comprised of polymers (like most things, glucose is the King at the molecular level for form and energy). Some of those polymers form cellulose and lignin, the two components that help wood in its natural form, withstand biodegradation for an extended period in the natural world. However, we’re talking about processed wood here and wood that has had the moisture removed as part of the engineering process. If you remove the water in the wood fibers, the degradation slows down even more. What happens if/when you reintroduce continued cycling of wetting to those same wooden fibers that were mechanically dried out? You are correct if you said it speeds up the microbes that “eat” the wood. Additionally, we get oxidation of the wood fibers which lends to the very darkening of wood coloring. Oxidation also is a decay process. (See this 2011 MIT paper for a brief explanation of wood and moisture: Bit.ly/wood-and-moisture.)

Figure 3: Late-stage Degradation to Rim Joist

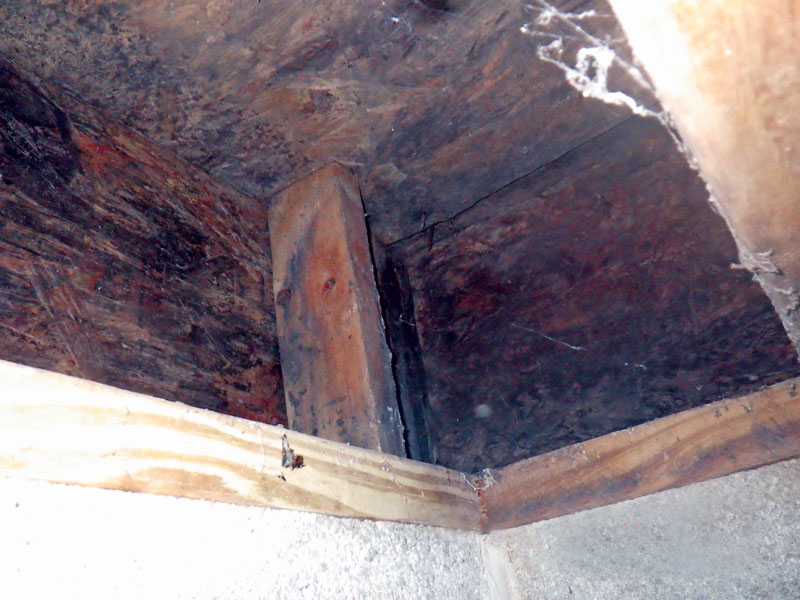
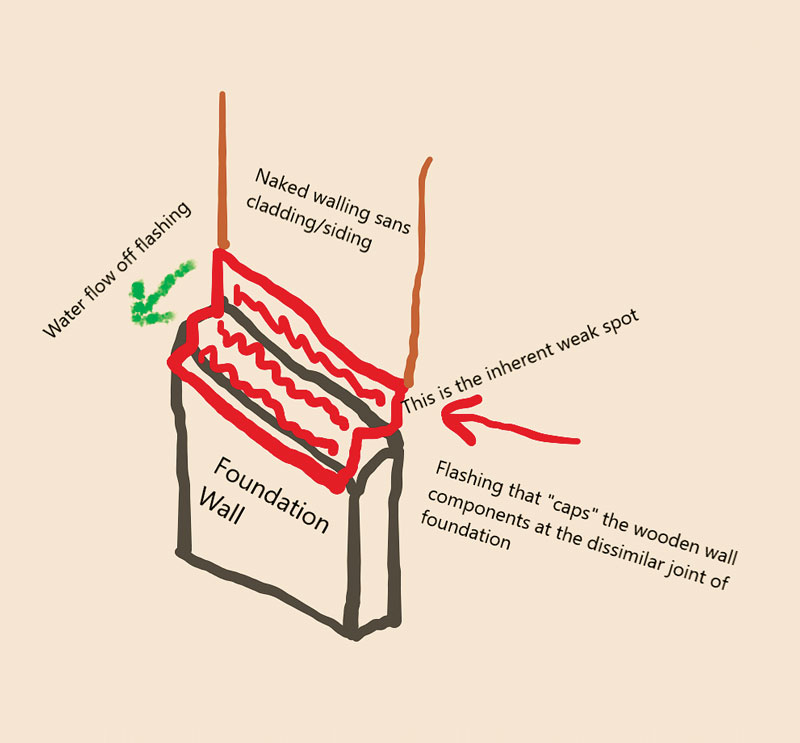
Figure 4: Flashing Illustration
Final Thoughts
Let’s jump ship from chemistry. I usually don’t bring up science with clients or in field reports because it’s confusing and usually unnecessary. And in truth, I usually have to “refresh” my own understanding routinely. The simple explanation fits well—you can’t take a material that was intended to be dry post-processing and allow it to repeatedly get wet. It degrades and anything it was supporting it no longer supports as well. Ergo, you must protect this dry product and keep it dry. Dry from the exterior wet world and dry from the interior (crawlspace) wet world. When you fail at this, the material(s) fail and you get unhappy homeowners, or shocked buyers who no longer want the otherwise pretty home. Pardon my artistic skills, or lack thereof, in Figure 4: Flashing Illustration. Here we see a crude mock-up of what flashing should “look” like where the walling meets our foundation, or at similar dissimilar junction points.
All of this, and I mean all of it, could have been avoided by a well-executed flashing installation. Then again, you can’t execute flashing installation well if the installer doesn’t understand the basic principles of building science and why they should flash, where they should flash, and how the flashing should be designed (ahem, to shed water). It’s important for inspectors to be aware of these types of incidents, so they can help homeowners identify them as quickly as possible.
About the Author
Greg Johns is the owner of a home inspection company in middle Tennessee. He is also a home diagnostic consultant and the current education director for the Home Inspectors of Tennessee Association. He works hard to keep his kids and flowers alive.

OREP Insurance Services, LLC. Calif. License #0K99465