

 | > E&O/GL Insurance for Home Inspectors Competitive Rates, Broad Coverage, Free Risk Management, online inspection support for tough questions, discounts on education and more… Professional Coverage, Competitive Pricing Shop OREP today! |
Inspecting Joist Hangers on Decks
by Reuben Saltzman, Structure Tech
Joist hangers are metal brackets that support deck joists. It’s almost impossible to build a deck without them, and there is a ton of stuff that can go wrong with the installation. Let’s cover the most common defects we find as home inspectors. (Simpson Strong-Tie® is the largest manufacturer of these products, so I’ll reference their standards.)
Missing Nails
Every hole in a joist hanger needs a nail. When nails are missing, the hangers won’t hold as much weight as they should.
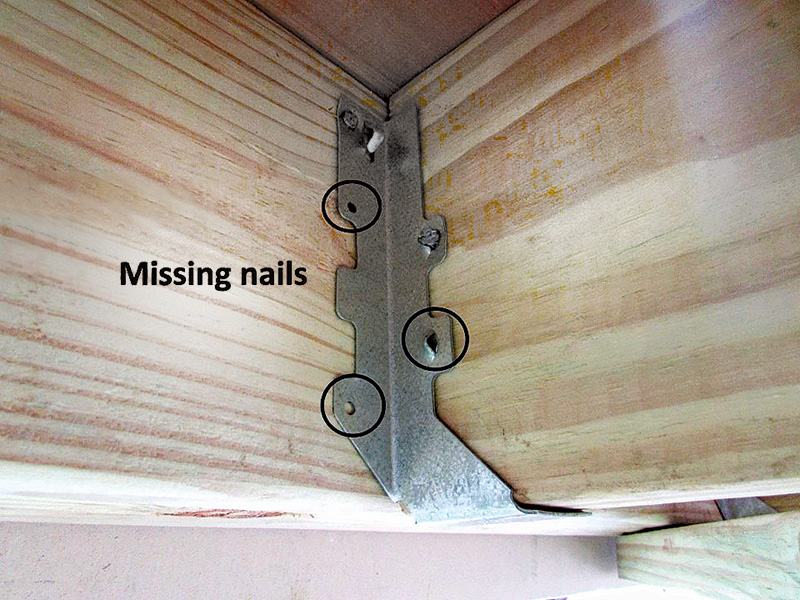

The fix here is simple: add nails.
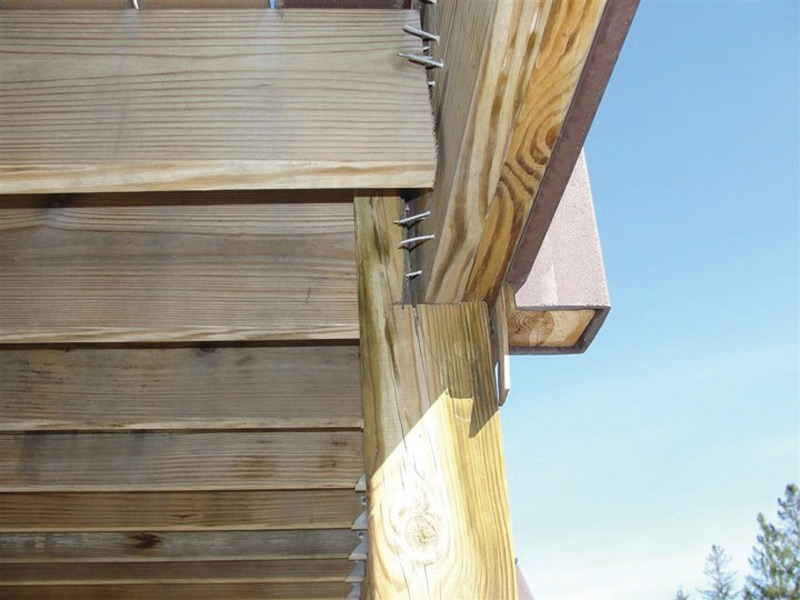
Screws Used Instead of Nails
Joist hanger manufacturers specify nails, because screws don’t have enough shear strength.


The only exception to this is when you’re using a structural screw specified by the manufacturer, such as the Strong- Drive® SD Connector screw, pictured above. If I see a screw with anything other than a hex head, I know it’s wrong.
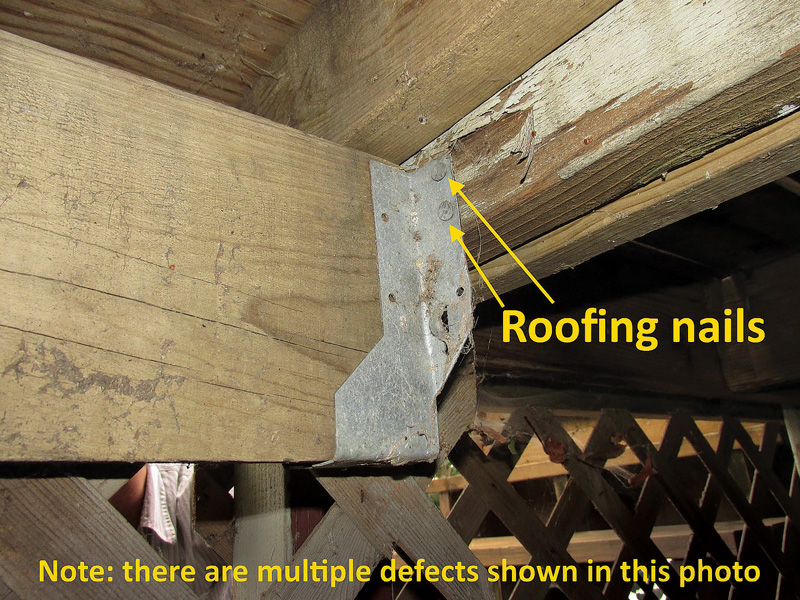
Wrong Nails
Manufacturers specify full-sized 10d nails for almost everything. Sometimes we find other nails, such as roofing nails.
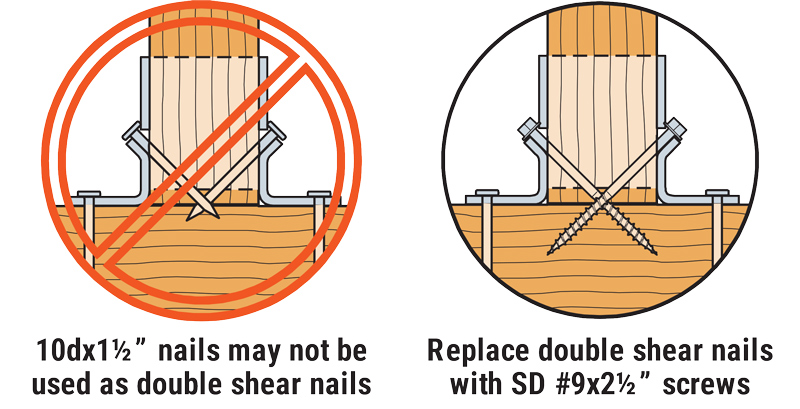
At other times, we find 10d x1-½” nails used for cross-shear nailing. The image below shows the difference between a 10d nail and a 10d x1-½” nail.
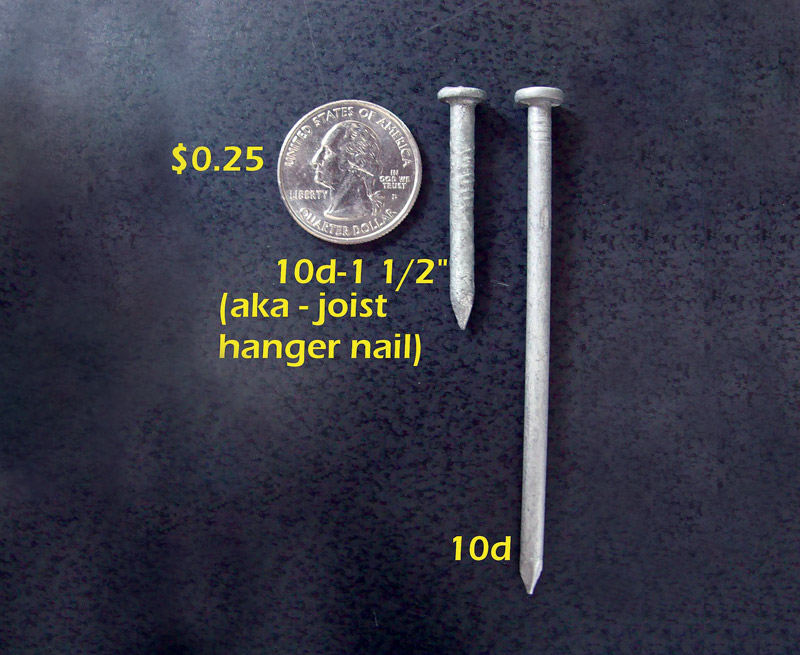
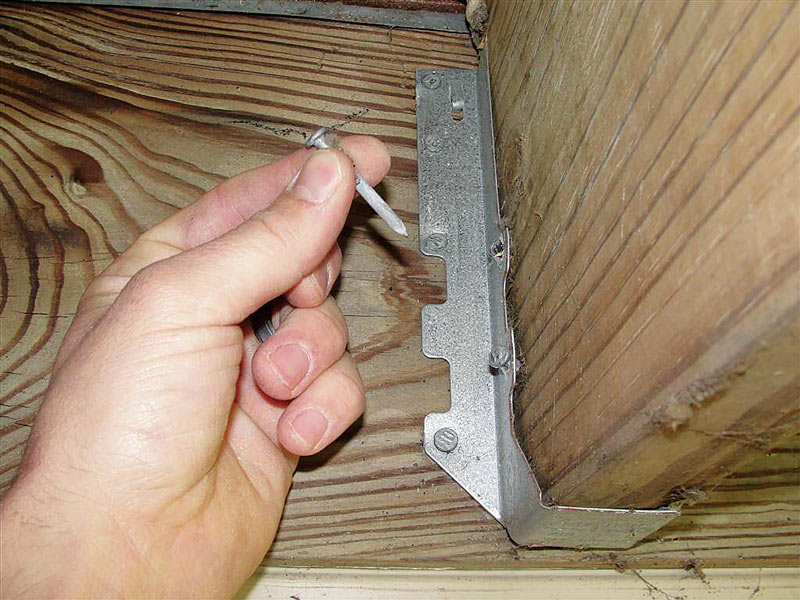
Those short little nails are made for joist hangers that have nails going directly into a joist; they’re short so they don’t come through the opposite side. But most joist hangers today require cross-shear nailing, where a 10d nail is supposed to go through the joist at an angle and secure it to the ledgerboard, as shown below.
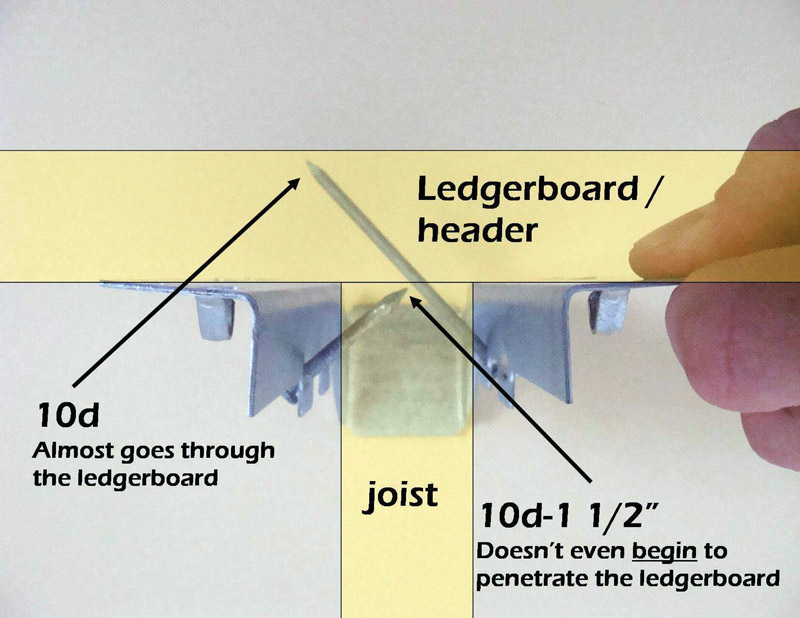
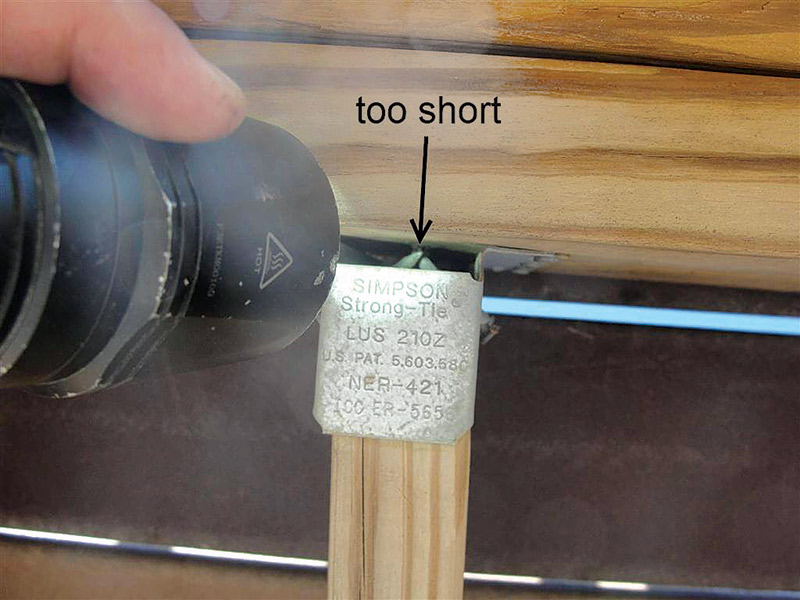
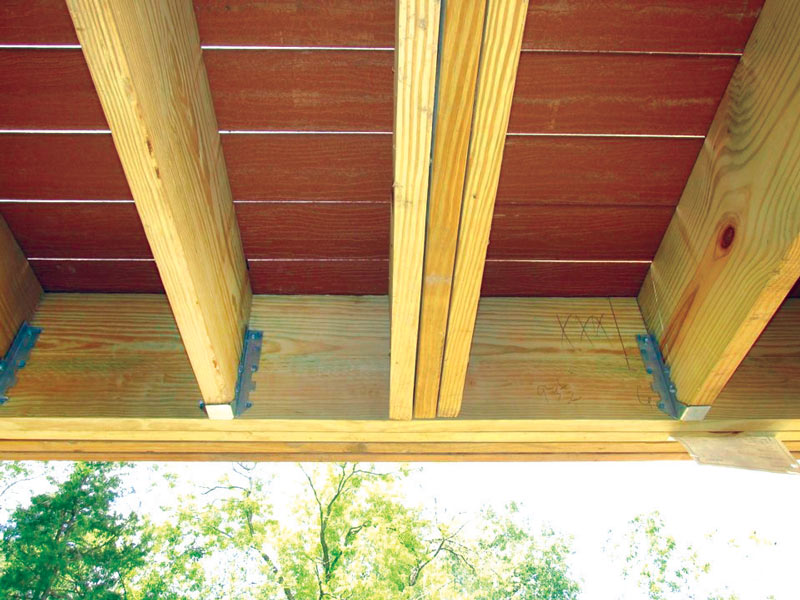
One easy way to know if the nails are too short is to look underneath the joist. In many cases, there’s a gap between the joist and the ledgerboard, and you can see the tips of the nails.
Another way to figure this out is to pull a nail out. If the wrong nails are used, they’ll pop out quite easily with a mini pry bar, like the one pictured below.
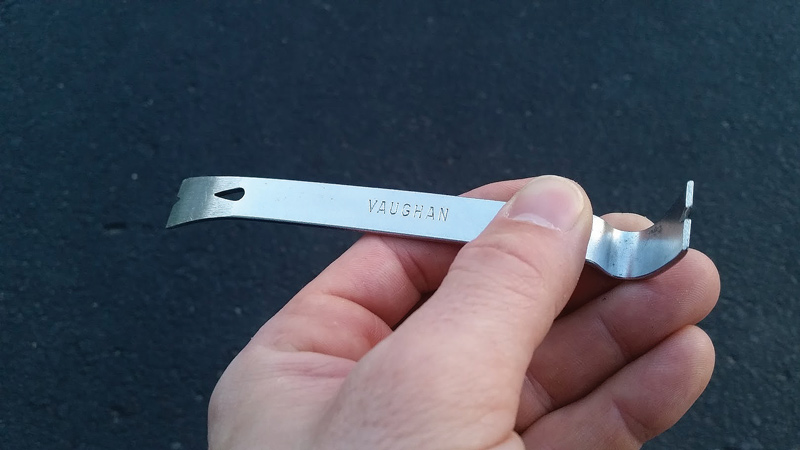
If the right nails are used, this little pry bar won’t do squat. The fix is to remove the wrong nails and install something like Simpson’s #9×2½” SD Connector screws.
To view “Repair of LUS Joist Hangers Installed with 10d x1-½” Nails”, click here. This document also lists the newly calculated load capacities, which I personally can’t imagine myself ever using as a home inspector. I leave that stuff up to the engineers.
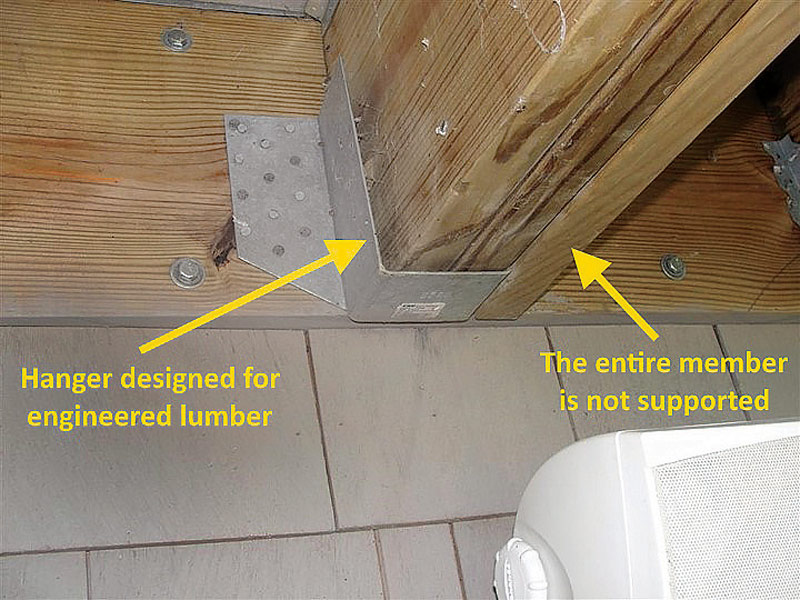
Wrong Hangers
Joist hangers can be designed for traditional dimensional lumber or manufactured joists. The hangers for these different types of joists are not interchangeable.
And if you have joists coming into a ledgerboard at an angle, you need to use a skewed hanger like those shown in Figure 1. You can’t just take a standard hanger and kinda, sorta make the joist fit.
(story continues below)

(story continues)
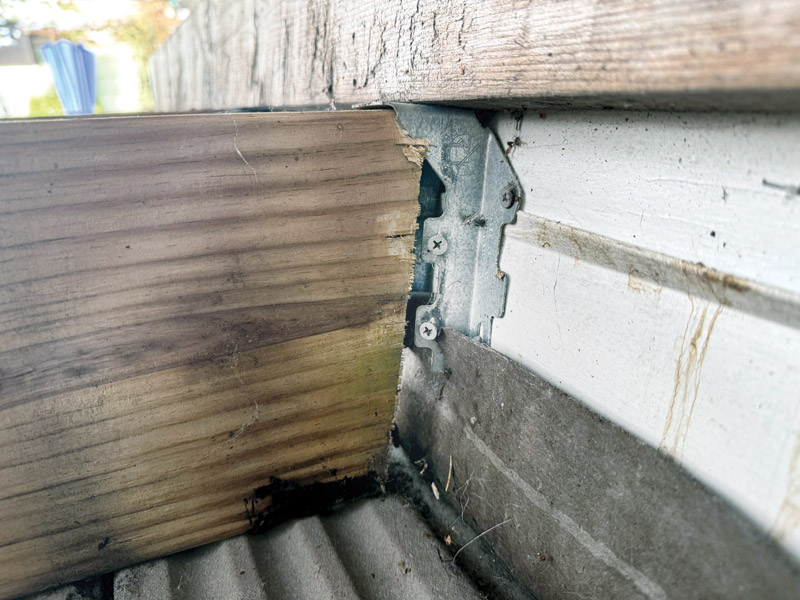
Lack of Full Ledgerboard
The entire hanger needs to be installed against a ledgerboard. You can’t leave half of it hanging out in space, see Figures 2 and 3.
Damaged Hangers
If you want a joist hanger installed at the end of a deck, you can’t just bend the end of the hanger by 90° and put nails into the end of the ledgerboard (see Figures 4 and 5). You need to use a special hanger on the end with concealed flanges, as shown in Figure 6.
Undersized Hangers
A joist hanger must be at least 60 percent as large as the joist. A 2×6 hanger can accommodate a 2×8, a 2×8 hanger can accommodate a 2×10, and a 2×10 hanger can accommodate a 2×12. The math is already worked out in Figure 7.
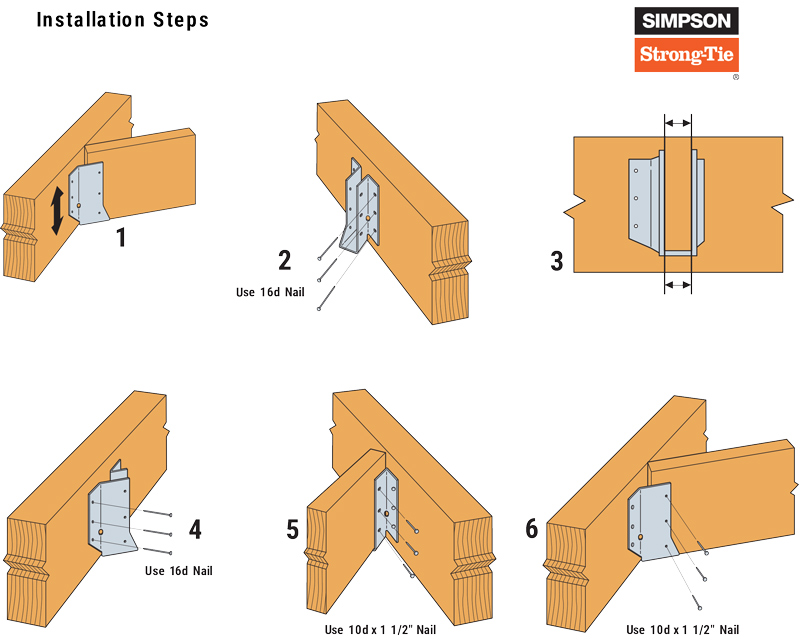
Figure 1: Simpson SUR/L Skewed 45° Face—Mount Hangers Installation
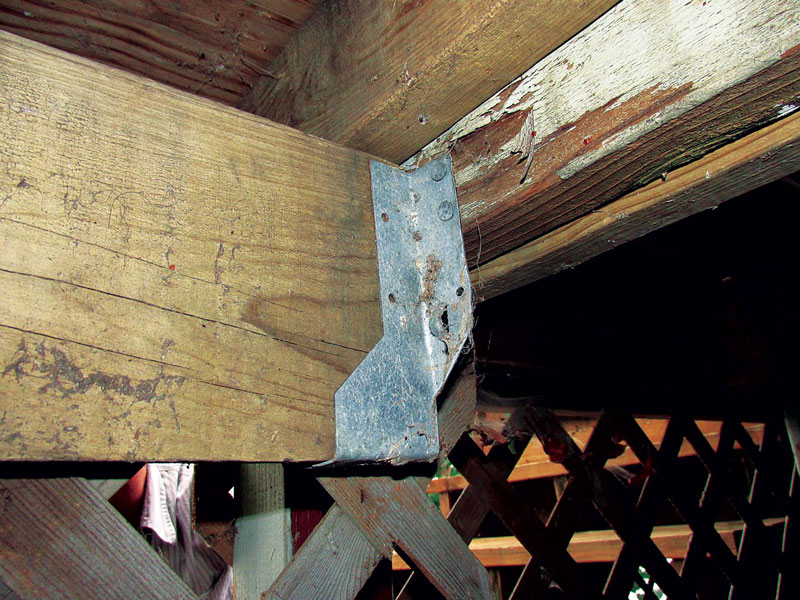
Figure 2: Install hanger against ledgerboard, not siding
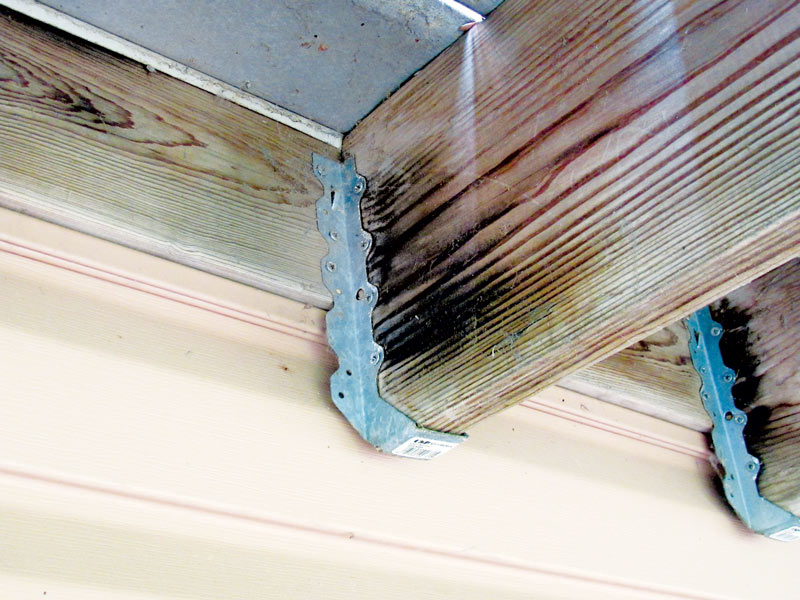
Figure 3: Install hanger against ledgerboard, not siding
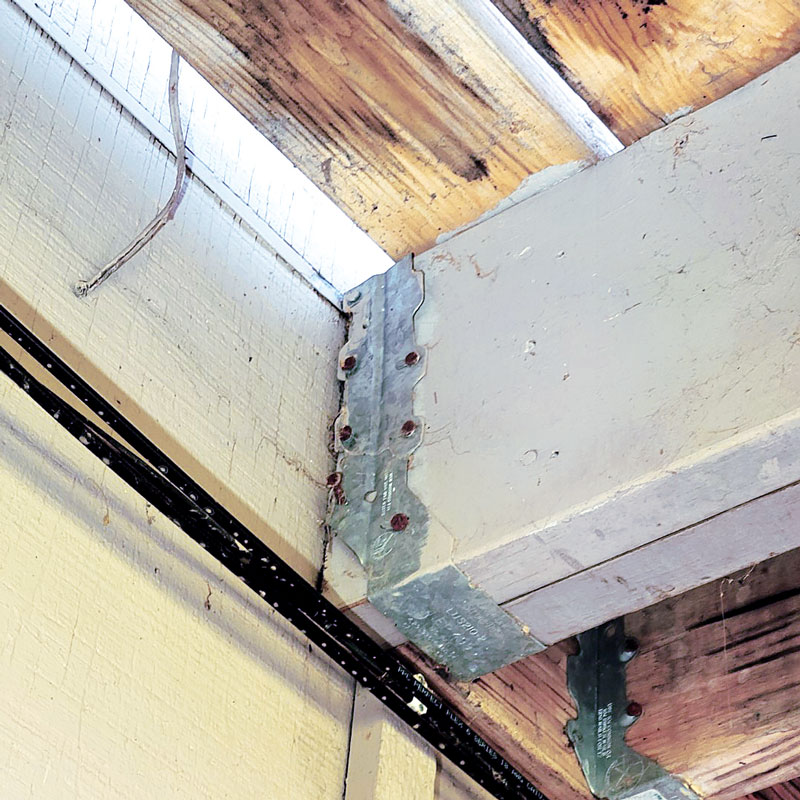
Figure 4: Field Altered Hangers
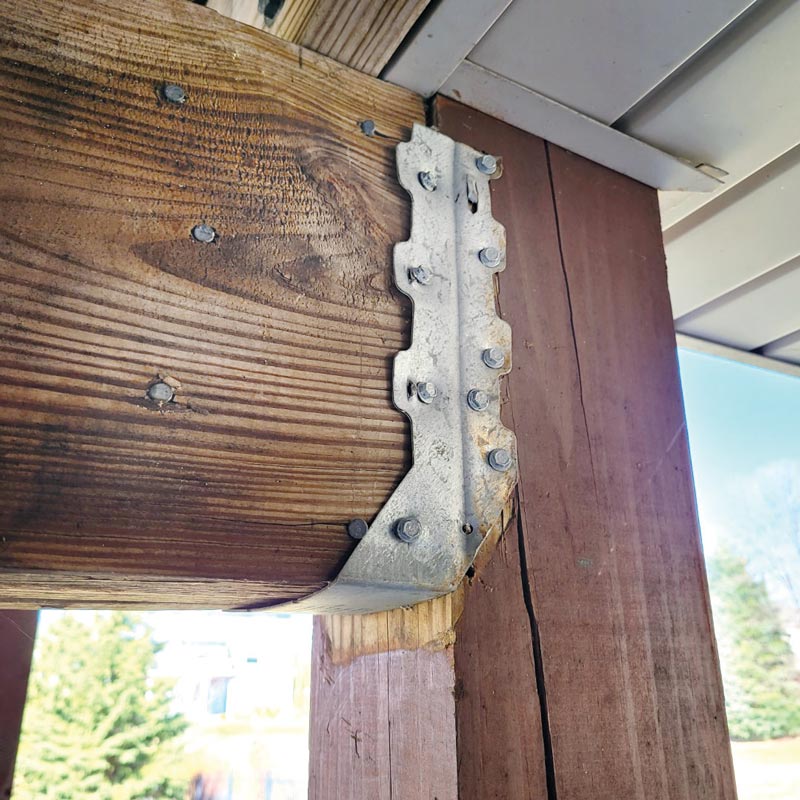
Figure 5: Field Altered Hangers
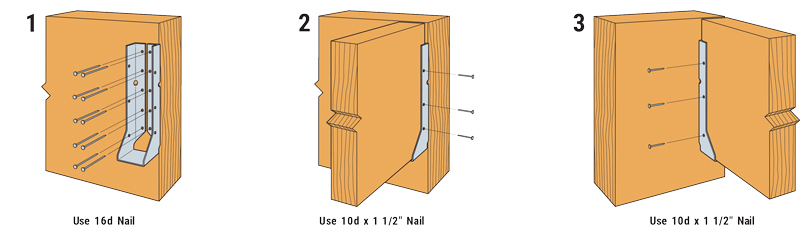
Figure 6: Simpson LUCZ Standard Joist Hangers Installation Guide—Specialized Hanger With Concealed Flanges
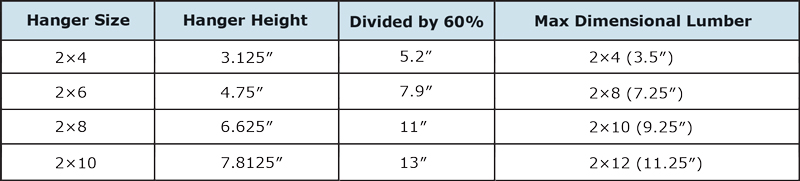
Figure 7: Conversion Chart Showing Hanger Size No Less Than 60% as Large as the Joist
Rusted Hangers
The treated lumber we’ve used for the last 20 years has chemicals that eat through steel, so you can’t use a standard joist hanger (see Figure 8). Hangers designed for contact with treated lumber will be hot-dipped galvanized or stainless steel. Simpson’s ZMAX® line has an extra-thick galvanized coating, and they have “Z” at the end of their model number (see Figure 9).
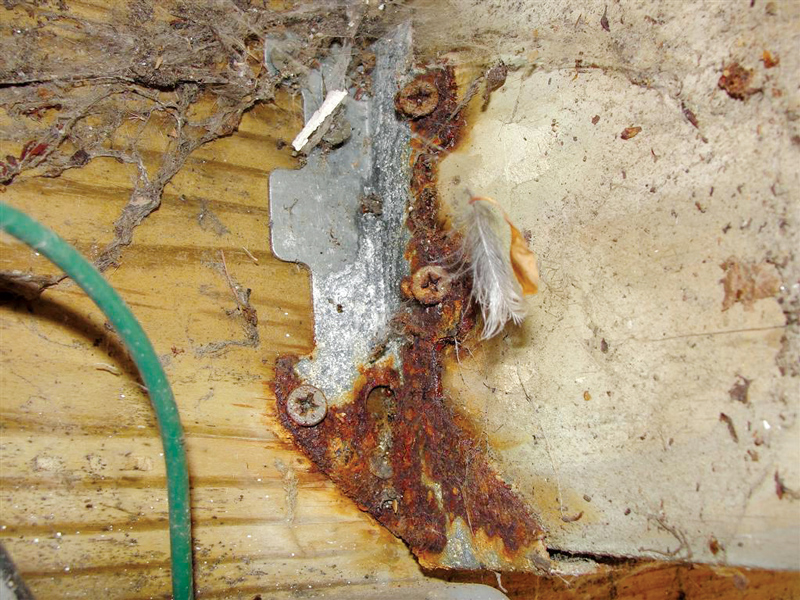
Figure 8: Rusted Hanger
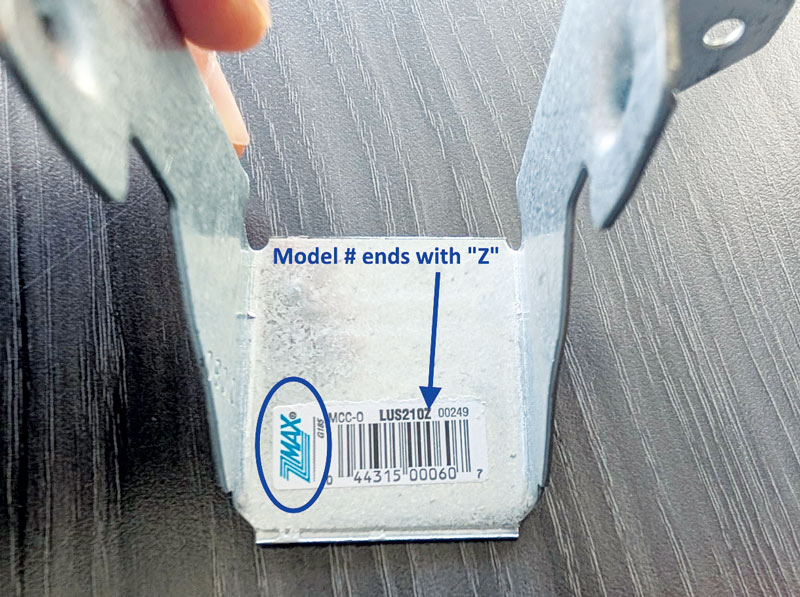
Figure 9: Simpson ZMAX® Hanger
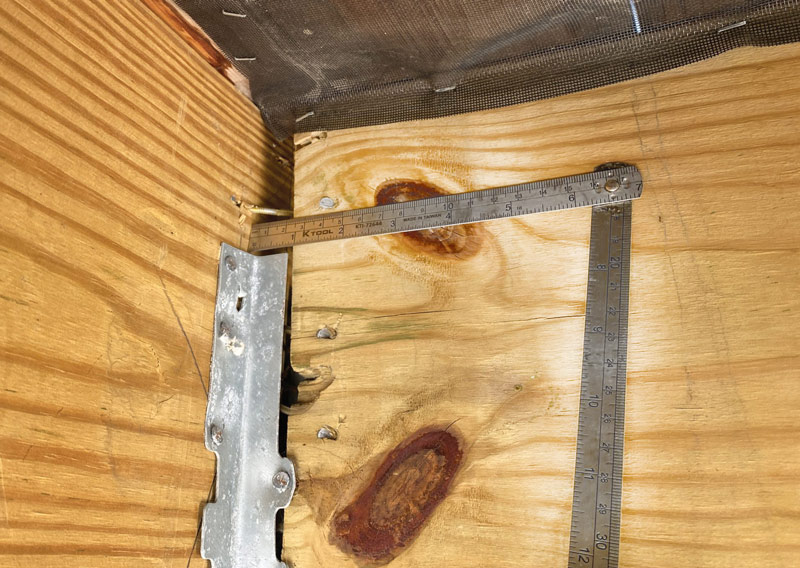
Joist Too Far From Ledgerboard
Joists should be installed with no more than a 1/8″ gap between the end of the joist and the ledgerboard. Larger gaps mean reduced load capacity. We don’t get whipped up about 1/4″ gaps, but the gaps shown below would need professional repair.
Missing Hangers
This one is pretty simple. Put ’em where you need ’em.
Summary
There’s a ton of stuff that can go wrong with a joist hanger on a deck. It’s a wonder we ever find them properly installed! No, I’m kidding. Most professional deck builders get all of these details right without even thinking about it, but many decks are built by other people with no professional background. They keep us home inspectors on our toes out there!
About the Author
Reuben Saltzman is a second-generation home inspector with a passion for his work. He grew up remodeling homes and learning about carpentry since he was old enough to hold a hammer. He worked for Structure Tech since it was purchased in 1997 and is now the owner and CEO of the company. To connect with him, visit https://structuretech.com/.
Published by OREP Insurance Services, LLC. Calif. License #0K99465